Toast UI Editor 사용하면서 알게 된 점을 정리하려고 한다. (단, 해당 글은 각자 API를 수신할 수 있는 Backend Server가 띄워져 있다는 가정하에 진행 - node.js / Flask / Django 등)
👉 1부 : Markdown 작성 및 Preview
2부 : 이미지 Upload 하여 저장하기 (S3)
3부 : Backend에서 받은 값을 받아 그려주기.
📌 Toast Editor란?
Web을 통해 Markdown 기반의 글 작성을 지원하는 JavaScript UI 라이브러리 및 무료 오픈 소스 프로젝트이며, NHN Cloud에서 지속적으로 관리하고 있다.
TOAST UI :: Make Your Web Delicious!
TOAST UI is an open-source JavaScript UI library maintained by NHN Cloud.
ui.toast.com
📌 Toast Editor 로 작성한 Markdown을 작성하고 Preview 보기
1. addArticle.html 에 파일에서 toast UI Editor용 css와 js 추가
2. addArticle.html의 <div id="editor"> </div> 를 toastui.js 에서 참고
3. toastui.js에서는 BE Server(켜져 있다고 가정 - node.js, Flask, Djano 등..) 로 API를 보내고 DB에 Data를 저장함.
: 저장 구조는 { title : <입력한 title> / content : <입력한 markdown> }
4. BE에서 Markdown은 문자열로 저장되며, 추후 값을 받아서 Editor의 Viewer 로 그려준다.
📁 addArticle.html
<!DOCTYPE html>
<html lang="en">

<head>
    <meta charset="UTF-8">
    <meta http-equiv="X-UA-Compatible" content="IE=edge">
    <meta name="viewport" content="width=device-width, initial-scale=1.0">
    <!-- Toast UI Editor -->
    <link rel="stylesheet" href="https://uicdn.toast.com/editor/latest/toastui-editor.min.css" />
    <script src="https://uicdn.toast.com/editor/latest/toastui-editor-all.min.js"></script>
</head>

<body>
    <h2> Toast UI 게시글 등록하기</h2>
    <h3> 글 제목을 입력하세요.</h3>
    <input type="text" id="title" class="post-title" placeholder="제목을 입력하세요">
    <br><br>

    <!-- Toast UI Editor -->
    <div id="editor"></div>
    <br><br>

    <button class="submit-btn" onclick="post_article()">등록하기!</button>
    <br><br>

    <div>
        <button onclick="getHtml()">내용 html보기</button>
        <button onclick="getMd()">내용 markdown보기</button>
    </div>
</body>
<script src="toastui.js"></script>

</html>
📁 toastui.js
// toastui.js
const Editor = toastui.Editor;
const editor = new Editor({
    el: document.querySelector('#editor'),
    height: '300px',
    initialEditType: 'markdown',
    previewStyle: 'vertical' // preview style
});

function post_article() {
    // 글 제목과 markdown 내용을 같이 넘긴다.
    editor_data = {
        "title": document.querySelector("#title").value,
        "content": editor.getMarkdown(),
    }

    // BE로 POST 요청을 보내서 해당 내용을 저장 (title, content(markdown))
    const response = fetch(`${backend_base_url}/article/`, { // 127.0.0.1:8000/article/
        headers: {
            Accept: "application/json",
            'content-type': "application/json",
        },
        method: 'POST',
        body: JSON.stringify(editor_data)
    });
    // 정상적으로 저장이 됬다면 200
    if (response.status == 200){
        alert("게시글 작성 성공!")
        window.location.replace("getArticle.html")
    }else{
        alert("게시글 작성 실패!")
    }
}

function getHtml() {
    alert(editor.getHTML());
}
function getMd() {
    alert(editor.getMarkdown());
}
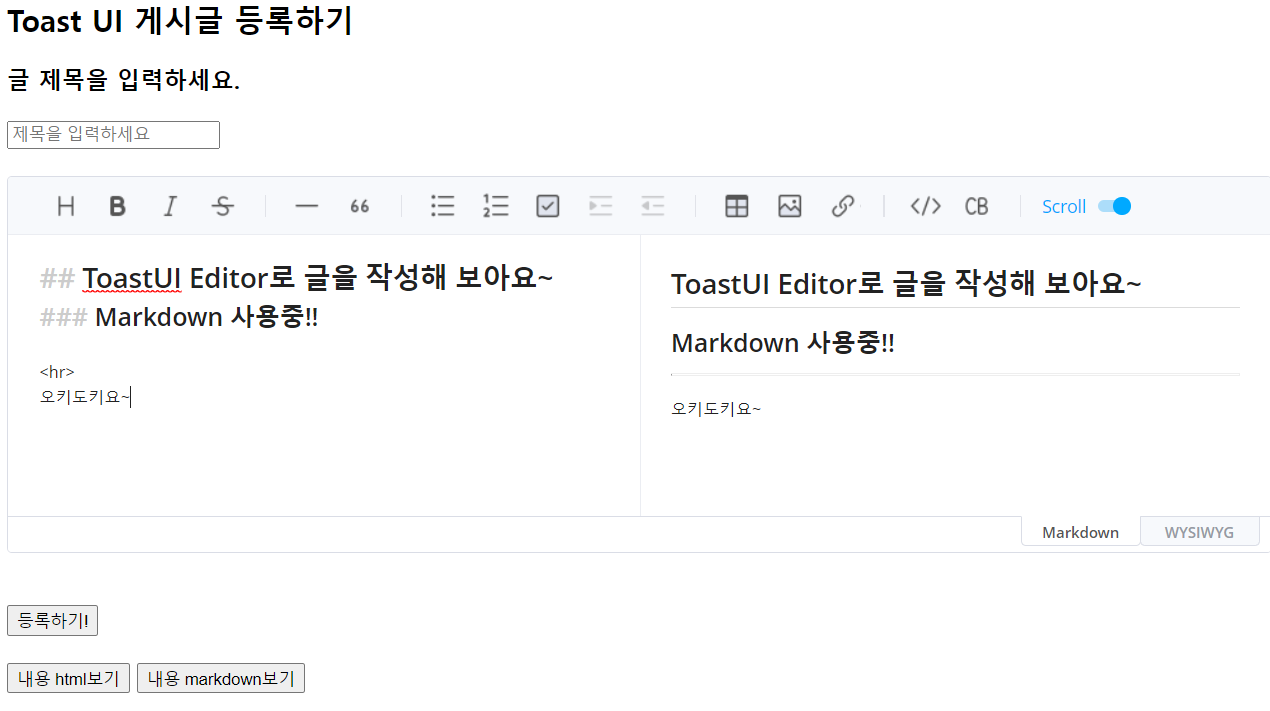
📌 결과 화면
실시간으로 markdown을 작성하면 옆에 html로 Preview 되는 것을 확인 할 수 있다.
'HTML, CSS, JS' 카테고리의 다른 글
| [Javascript] destructuring assignment - Uncaught (in promise) TypeError: Cannot set properties of undefined 에러 (0) | 2022.07.20 |
|---|---|
| [Javascript] 이미지 Upload 및 Preview 초간단 ver (0) | 2022.07.14 |
| [JavaScript, JQuery] HTML Import 하는 방법 (0) | 2022.07.10 |
| [JavaScript] 로컬스토리지 vs 세션 스토리지 (0) | 2022.07.10 |
| [Javascript] 업로드 이미지 BE와 주고 받기(FE, by Blob 객체) (0) | 2022.07.10 |